November 30, 2010

Mamoworld: a new After Effects resource


Mamoworld is a new After Effects resource with free video tutorials and scripts by Mathias Möhl, who is already known for his AE scripts and tutorials on his previous blog AE Extensions and on AE Scripts (see previous AEP notes). The new site has 4 fresh tutorials and some older ones.

Mathias also provides new versions of his AE scripts on the new site. All scripts have both a German and an English user interface. The MochaImport interface has been updated with intuitive new features, for example with a way to work with a stabilized version of the footage in a precomp so that all changes performed there are automatically applied also to the original unstabilized one. This feature is also available for corner pin tracks without needing a third-party plug-in. Those that know Tracker2Mask, KeyTweak, and Chameleon (for color swatches) may want to take a look at their new features too.

Scripts aren't meant for scripting gurus, so duck in! By the way, see comments by Mathias on the various strengths of approaches to tracking in AE in Building an Airport Scene with MochaImport [updated].

Here's one of the new tutorials:

November 29, 2010

Illustrator to After Effects Motion Paths

@AdobeAE notes an Adobe TV tutorial by Colin Smith on copying paths from Illustrator as motion paths in After Effects:

"Have you ever tried to create a complex motion path in After Effects? This tip will show you just how well Illustrator and After Effects communicate using a simple copy and paste to the clipboard and transfer illustrations to motion paths in After Effects!"


Note: this topic was covered earlier by Aharon Rabinowitz in Importing a Motion Path and by Trish Meyer in Pasting Paths from Illustrator to After Effects: The essential trick to paste multiple paths to After Effects Shape Layers at once.

Update: just a note on an Illustrator script resource Scriptographer via the Plural Blog.

Linked index to Deeper Modes of Expressions

Chris and Trish Meyer have finished posting the series on expressions in After Effects and provide a linked index of the 12 installments at Deeper Modes of Expression: The Index.

Light glow on 3D surface in AE + particles project


via @EdenExposito, Video Copilot has a new After Effects tutorial video, Light Glow:

"In this quick motion graphics tutorials we’ll create a natural light glow illuminating from your title onto a 3D surface. This tutorial also includes tips for generating a simple chromatic glow effect."

Update: Andrew added Light Particles Project to "recreate the effect with particles instead. The idea is having bright glowing particles that emit light onto the surface as they hit without having to hand animate the interactions. In the end, I used the shadow technique from our particle shadows tutorial using a copy of the particles from the top view to simulate the shadow, only here I used the copy as colored light."

Expressive Text: Deeper Modes of Expression #12

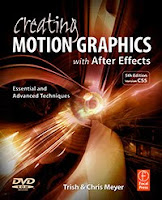
Chris Meyer posted the last of the 12-part series Deeper Modes of Expression, based on an extra in Creating Motion Graphics with After Effects, which was recently updated for CS5.

The 12th installment is Deeper Modes of Expression, Part 12: Expressive Text on ways to manipulate numbers and text using expressions:


"Finally, we’d like to demonstrate ways to use expressions to manipulate text created with the new Type tool. We’ll show how to display time and parameter values as text, both for diagnostic purposes and to create graphical elements. On the second page we’ll show to how to manipulate strings of text, including using the Buzz Words animation preset to cycle through words in a list. Then on the last page we’ll talk about the Expression Selector to animate text created with the Type tool."

ExpressionUniversalizer to translate expressions

ExpressionUniversalizer is a new script from Lloyd Alvarez at AE Scripts that will "convert the expressions in your projects so that they are compatible with After Effects running in ... [now] English, French, German, Italian, Spanish and Japanese ... once the project has been universalized it can be open by ANY language ...The geeky explanation of how the script does this is it converts all the localized effect references in your expressions to the After Effects 'under the hood' match name which is the same in every language." Lloyd explains more in his demo below.
ExpressionUniversalizer goes a step beyond an older script by Charles Bordenave (nabscripts) that's also at AE Scripts, TranslateExpressions, which translates expression control names according to the language of the running version.


Procedural dispersion with Trapcode Particular

@rymden notes a new "layer removal" tutorial for Particular, Dealing With Spontaneous Particle Combustion by Ben Watts at AEtuts. Here's the preview; Ben says:

"In this tutorial I will demonstrate how to build up a procedural dispersion effect using Trapcode Particular. This is great for burning off logo’s, text or even 3d renders. The color and motion of the effect can be changed easily as well as the wipe angle thanks to handy global wipe control we will construct."

November 28, 2010

Gravity preset, Unpack Precomp script + more


@AdobeAE notes some free utilities by Jesse Toula, who has the new tutorial on Custom Shatter Maps. Among the templates and footage for sale are his Unpack Precomp script and a Gravity preset, Quick Gravity, and a separate tutorial.

[Update: didn't check to see if this was the same but Jesse Toula now has a Gravity in After Effects tutorial on Creative Cow.]

There's probably more resources in AE Help, but you can also check out a script palette that's been shipping with AE called Gravity.jsx for a bouncing ball effect. For something similar with expressions, see Dan Ebberts' Bouncing Ball example on MotionScript, and his gravity expression triggered by a marker at Creative Cow (see also Expression example: Animate scale at each layer marker):

g = 1000; // gravitational constant

if (marker.numKeys > 0 && time > marker.key(1).time){
t = time - marker.key(1).time;
y = g*t*t/2;
value + [0,y]
}else{
value
}

Update: see also Better Bouncing in After Effects on a similar preset by Ian Haigh.

Custom Shatter Maps for After Effects

Jesse Toula has a new video tutorial on Custom Shatter Maps for the Shatter effect in After Effects.

Additional tips can be found in AE Help, in Design a Breathtaking Body Shatter Effect by Lloyd Alvarez on AEtuts, and Planet Explosion from Video Copilot.

There's also a good thread with some info derived from Brian Maffitt (who originally designed this "Evolution" filter) [and update: maybe the definitive explanation in Chapter 5-6 of Brian's classic tutorial, via Shatter plug-in tour from Total Training vault].

Update: Jesse adds extra detail and corrections to his tutorial,

'I recently got some notes on my tutorial, "Custom Shatter Maps" from the creator of the "Shatter" effect, Brian Maffitt. He tells me that there are a couple little things I misinterpreted.

1) Shatter maps do not "ignore" black, they ignore transparency. In my case, the background was set to black, so what I was calling black was actually transparent.

2) "Cyan, Magenta, Yellow, Blue, Green, Red, White, and Black. Those are the only important colors to consider when making a Shatter map, and anything else will be "clamped" to those colors inside Shatter. You can turn off "interpolate palette" in Colorama to force the primaries in the shatter map, which will give you an excellent visual preview of the results."

So there are a couple notes straight from the creator. Keep them in mind when you are making your shatter maps.'

November 25, 2010

Filmstrip animations in After Effects

@AdobeAE noted a Roland Kahlenberg tutorial that shows the use of Digieffects FreeForm to create a filmstrip. It's a new text tutorial on a Toolfarm database that teaches how to make the filmstrip and much more along the way.

There are several more filmstrip tutorials, mostly with different looks, and a free Mac plug-in:
  • While not a filmstrip Hypoly shows you an effect that might be handy, how to create a 3D Ribbon / Wire in AE with Trapcode Particular and a few expressions.
  • Image Filmstrip is free in the After Effects version of ImageFlow (Mac OS X only) by CoreMelt

November 24, 2010

'Creating Motion Graphics' review + giveaway


@aetuts (Adam Everett Miller) says "Retweet, I'm gonna pick somebody to send a copy of the book to."


Update: new version.

CameraTracker AE 201 training series

The Foundry has released an AE 201 training series for its CameraTracker plug-in (sample below). It:

"builds on what was covered in the 101 series. Topics covered include integrating CameraTracker with Red Giant Software's Trapcode Particular to achieve light sweep particle effects in a moving camera scene, projection mapping both natively in AE and with Digieffect's Camera Mapper, and in-scene graffiti. ... There's also a french language tutorial put together by Mattias Peresini (Mattrunks) linked to from the same page."

Mocha AE tracking in Moving T-Shirts

Eran Stern shows how to track graphics and blend them onto Moving T-Shirts in a new After Effects tutorial video.

November 23, 2010

Spy Photo: free presets for After Effects

Spy Photo is a set of free presets for After Effects to help create the look of snapshots taken by a spy or private investigator. Created by Dan Ebberts and Aharon Rabinowitz, the presets are dynamic and require no keyframes. They work with CS3 and later, and don't require 3rd-party plug-ins.

Here's a video tutorial; there's more from
Aharon Rabinowitz on All Bets Are Off Productions:

Automating lower-thirds with After Effects

Adam Everett Miller has a new workflow tutorial on AEtuts, Enough Lower Thirds To Feed A Small Country, which uses the well-documented CompsfromSpreadsheet script by Mike Cardeiro from AE Scripts.

This post has been expanded and update, see Free lower thirds and tutorials: Leverage Photoshop, Premiere, and After Effects at PVC.

November 22, 2010

Copy to Clipboard plug-in for AE


via @gutsblow is Copy to Clipboard plugin for AE, another free After Effects plug-in from Video Copilot. It's "not really ground-breaking" but the old one from ObviousFX wasn't updated for CS5. [In comments, Andrew Kramer says the copies are "screen pixels" so maybe not really 32 bpc.]

Natural’s Not In It

It's still very strange to hear the Gang of Four on that XBox commercial, or on TV at all really. Maybe it's no stranger than some stuff you might hear on the muzak in Safeway.

Blending Modes from 'AE CS5: Learn by Video'

Peachpit posted this sample tutorial from After Effects CS5: Learn by Video, which includes 14 hours of video instruction from instructor Angie Taylor and Adobe Technical Support Lead Todd Kopriva. Todd's description of the package was posted here earlier. BTW, this embed behaves better on Firefox than Chrome.

Sliced breakdown template for AE

Jake & Dan posted a free Giveaway: AE Comp-Fan Template for VFX Demo Reels (via):

"In their demo reels, compositors and matte-painters basically have to demonstrate their ability to build up different layers to create the illusion of a realistic environment, depth and perspective. The easiest way to do this is what we call a Comp-Fan or “Sliced Breakdown”. We are giving away the template we’ve created in After Effects for that purpose... [though] the template can be used outside of a reel."

You may also like Mike Cardeiro's script
Trajectory and other 3D scripts at AE Scipts.

Premiere CS5 6 months later + Avid switchers

@AdobePremiere twittered on a few interesting items today. At DVInfo.net, Pete Bauer takes another look at Premiere Pro CS5 and adds some advice in Premiere CS5 Six Months Later. Here's an short excerpt:

"I’m using a home-built i7 980X with 12GB of RAM, Quadro FX4800, SSD for the OS and a 4 HDD RAID0 for Preview files. I routinely edit 20 – 90 minute timelines using 3-4 HD cameras in a variety of HD formats, typically using “Render and Replace” to sweeten audio in Soundbooth, and include some dynamic links to short After Effects comps. I did have a couple of seemingly random but non-repeatable crashes fairly early on. Thinking back over the past couple months since going to version 5.02 I honestly don’t recall any crashes at all.

I simply cannot overstate how satisfying it is to throw four different types of HD files on a timeline, multi-cam them, color correct, rotate, scale, add transitions, and still see a yellow bar (meaning no preview file rendering is needed) and enjoy fluid performance on the timeline. In fact, I just recently did that with Canon AVCHD, 5DmII MOV, HDV, GoPro mp4 and 24 bit audio wav files all working together in the same multi-cam and target sequences."


Not that everything is always fluid in Premiere -- sometimes you'll see several second pauses before playback starts, app startup can be comparatively lengthy, and conforming can make you wait (though conforming is much less painful than previous releases).

Also tweeted was a new video learning product from Video2brain (for Avid users, a very tough room), Premiere Pro CS5 for Avid Editors: Your Guide to Making the Leap to Premiere Pro! [later, about a half hour of samples were posted from this set on Video2brain]

Working with RED proxies in After Effects


Chris Meyer has a new PVC article, Using RED Footage Proxies in After Effects, on using auto-generated lower res proxy files to speed up work before rendering. Here's the intro:

"Many people like to shoot RED source footage these days, even if the final destination is lower-resolution video. I agree, it’s nice to have all of those extra pixels to play with - except when you have to actually read them off disk and process them in order to see a frame in a program like Adobe After Effects. Well, After Effects has a little-known feature called footage proxies that can speed up your workflow up until it’s time to render."

For more, see Placeholders and proxies in AE Help and Proxies & Workflow Tips, a video tutorial by Andrew Kramer on proxies and output modules and templates.

November 21, 2010

SF Cutters @ Avid 12-1 + Avid/RED webinar

SF Cutters -- brought to you originally by the Option key in Final Cut -- is having a night hosted by Avid on Wednesday, December 01, 2010 from 6:30 PM - 9:30 PM.

Tickets are going fast. This meeting is at Avid (Digidesign), 2001 Junipero Serra Blvd in Daly City (not real far from BART). Here's the current agenda:
  • Chris Nelson, editor of Lost and Mad Men
  • Michael Krulik, Avid Sr. Applications Editor
  • Jesse Spencer, expert sharing tricks
  • drawing includes Avid Media Composer 5!

    Update: see Scott Simmons on a free webinar with the experts on December 2, Avid and RED team up for a RED workflow webinar.

    November 20, 2010

    Profiles and color management in AE


    Andrew Devis has a new After Effects tutorial video, The AE Color Space, which looks at some basics for color management:

    "You spend a lot of time making sure your project looks just right, but if you don't embed a colour profile into your final output, then you have no control over how that precious project will look on other machines and devices! In this After Effects video tutorial, Andrew Devis explains how this works and shows how to set up a colour profile for your project; and then how to embed it into your output so that you can be sure all your hard work will be properly represented on other devices."

    For more on color management, see many pages in AE Help starting at Color, books like Mark Christiansen's After Effects Studio Techniques and Creating Motion Graphics with After Effects by Chris & Trish Meyer, and these previous AEP posts:

    • Color Management in a CG workflow (Johan Steen discussing "how to calibrate and profile your display and then how to configure and setup your 2D, 3D and post processing applications for a color managed workflow.")

    November 19, 2010

    Color control panel for the iPad

    @andymees notes summaries by Peter Salvia on the free Tangent Devices vWave-Lite for the iPad, noted recently by Steve Hullfish, Bob Sliga, and others. See blog scoop – chris from tangent devices discusses vwave-lite for ipad and color control panel for the ipad at Salvia's blog Proactively for a look cool vs. cost and lack of tactile feedback. Here's a video of the iPad app from Steve Hulfish:

    Blend modes in Premiere Pro & beyond

    Chris Meyer looks at Blend Modes in Adobe Premiere Pro. Layer composite modes were added in Premiere CS4, though forever a feature in FCP where layer dupes and mode changes sometimes served as quick & dirty color correction or a soft focus look (with a blur on the top layer). See also Chris' older Composite Modes in Final Cut Pro.

    For more, see Blending modes and layer styles in AE Help, AEP posts tagged blend modes, and The Pass Through Blend Mode and others in a series of recent posts on blend modes in Photoshop by Adobe's Julieanne Kost.

    There's in-depth treatment of concepts behind blending modes in various Adobe docs, but good practical in-depth info can be found in handy books like Mark Christiansen's Adobe After Effects CS5 Visual Effects and Compositing Studio Techniques and Creating Motion Graphics with After Effects by Chris & Trish Meyer.

    Update: Peachpit posted a sample tutorial on blending modes from After Effects CS5: Learn by Video; Todd Kopriva's description of the package was posted here earlier.

    Background rendering with After Effects

    There are several ways to run multiple instances of After Effects for AE background rendering:

    • RenderQ, a free render queue for OS X
    There more on rendering via AE Community Help and in AEP posts tagged Background rendering and render (for example After Effects render tips and How to Optimize Projects in After Effects CS5).

    Update: in comments Joost van der Hoeven notes Nucleo Pro 3 (compatible with CS5), an AE plug-in from GridIron [no longer developed].


    SynthEyes Javascript export to After Effects tutorial

    SynthEyes 2011 is out and offers tracking, set reconstruction, stabilization, and motion capture -- and there's free or discounted upgrades to users who purchased after June 2010. Among the many new features is a full-featured export to After Effects using Javascript, which supports textured Cards, moving objects, automated background setup, and SynthEyes-equivalent undistort and redistort layer effects inside AfterEffects.

    Here's a quick tutorial on this from SynthEyesHQ (along with 5 others):

    November 18, 2010

    Rotate AE camera around point of interest


    Here's 2 responses to a question on the the AE-List, "is there a way to make an AE camera rotate around its point of interest?"

    Chris Meyer, coauthor of Creating Motion Graphics with After Effects, wrote:

    "Create a Layer > New > Null Object. Enable its 3D Layer switch. Copy the coordinates of the camera's Point of Interest, and paste to the Position of the null. Then parent the camera to the null. Rotating the null will now swing the camera around, as if it was at the end of a pole. Admittedly not as easy as Motion's 3D camera, but it's the trick many use to create perfect orbit animations.

    Here's more on the orbit camera rig, Camera Control, Part 1: Auto-Orient & Orbit, (Some basic 3D camera control tricks in Adobe After Effects)
    by Chris and Trish Meyer.

    And while we're at it, here's a bit on a dolly rig (although the new Separate Dimensions option allows you to perform many of these moves with just the camera layer now), Camera Control, Part 2: Graph Editor & Dolly Rigs (Using parenting, expressions, and the new After Effects 7.0 Graph Editor to better control a 3D camera) by Chris and Trish Meyer."
    [reformatted for blog]


    Rob Birnholz, author of the video set Pro Training for the After Effects Camera, added:

    "To easily rotate the camera 360º, place a null object where you want the camera to look at. Make the null 3D, then link your camera to the null. Rotating the null on the Y axis will swing the camera around without having to draw a messy path. Auto orient your layers to always face the camera if applicable to your scene. ... that's covered in chapter 13 of my AE Camera training from Toolfarm."


    There's much more in the AE Help
    page Adjust a 3D view or move a camera, light, or point of interest and in various posts tagged AE camera.

    Graymachine: 17 free presets + tutorial

    Here's an After Effects tutorial from Graymachine for Super Awesome Presets Volume 0001, a set of 17 free presets from Harry Frank (bullet formats, auto fade, pops, bounce, etc.):

    November 17, 2010

    Torn cardboard texture tutorial + letters

    Shortformvideo has another quick and easy texture tutorial and project for After Effects, Torn cardboard texture, which creates a torn corrugated cardboard texture using just the standard tools in After Effects (CS3, CS4 or CS5).


    Related tutorials include the original one from Brian Maffitt of Total Training, the free AE project from Aharon Rabinowitz -- Page Rip, a turorial by John Einselen -- Dynamic Paper Cutouts (with Turbulent Displace effect), and a kinda fuzzy Paper Rip Effect in After Effects from Michael Szabo. The last one, embedded below, uses Photoshop and After Effects (CC Page Turn) filter. The recent "Burning Edges" tutorial seems related too, but there don't seem to be AE tutorials using scans of ripped or torn paper.


    BIGMIKEDESIGN: Paper Rip Tutorial from Mike on Vimeo.
    Update: Laurance returns quickly wih a sequel, Torn-out cardboard letters,

    Pop-up books in After Effects

    AEtuts posted Unfold A Magical Pop Up Book Simulation by Nicolas Plaire, an After Effects tutorial video in 2 parts. In part 1, the pop-up and 3D scene is built, then in part 2 trigonometry and more is used for interaction between layers to unfold elements with a minimal number of keyframes. Seems pretty cool and you can adjust the camera animation to taste.


    Update: there was another pop-up book tutorial at Digital Arts, AFTER EFFECTS TUTORIAL: MAKE AN ANIMATED 3D POP-UP BOOK, written by Sam Hampton-Smith.

    For something not completely different see Cross-processing look in After Effects + Flip-Book Effect.

    Sneak peek of 3D Invigorator for After Effects +


    The next version of 3D Invigorator, a plug-in for After Effects, is close to release. Zax Dow posted a sneak peek demo movie of some of the new drawing features, including:

    - Bezier drawing tools
    - Instant 3D object creation as you draw
    - Instant holes
    - Realtime interactive editing

    Update: Oh, in e-mail Zax added "We should be releasing next week. Windows CS4/CS5 and Mac CS4. Mac CS5 won't be out for a couple more months."

    Later Zax added, "We've done a lot of work to Invigorator's text handing.
    • It can now handle OpenType fonts in Roman and Unicode format. (sorry no LTR writing yet)
    • We've also enhanced our TrueType handling which at times created "notches" in the curves of some fonts.
    • The text window now shows you previews of all fonts and families.
    • You can type the first few letters of the font name to skip through a long list of fonts.
    • You can save font favorites. (Our font favorites are the font, size, leading, scale, baseline shift, etc. Not just the font.)
    And ready for a treat? You can also edit the bezier curves of text characters without having to convert them to paths. This allows you to make texty-type changes (switch justification, change margins, etc) and any edits you've made to the curves will be preserved."

    Update 2: the peeks continue in 3D Invigorator 5 Sneak Peek – Material Controls.

    Cow reviews CameraTracker for After Effects

    Bill O'Neil reviewed CameraTracker by The Foundry for Creative Cow. CameraTracker is a plug-in that "allows you to pull 3D motion tracks and matchmoves without having to leave AE. It analyses the source sequence and extracts the original camera's lens and motion parameters, allowing you to composite 2D or 3D elements correctly with reference to the camera used to film the shot."


    O'Neil demos CameraTracker with several movie samples and screenshots and says:

    "CameraTracker will also integrate with other comp camera effects such as Shatter; and third party effects such as Trapcode Particular, Lux and Stroke. The Foundry's last video tutorial explains this.

    The Foundry's CameraTracker has a slight learning curve, but once you understand how it thinks, you will be on your way to pulling great tracks and match moves inside of AE. There are unlimited possibilities with this tool, including the creation of set extensions, projection mapping, and in-scene titles, to name a few."
    ... Read the rest at Creative Cow.


    By the way The Foundry has 10 tutorials and docs for Camera Tracker, and lists other resources too, including a 3-part tutorial at AEtuts. For some other resources see Voodoo Camera Tracker: free matchmove alternative with AE.

    November 16, 2010

    Energy balls in After Effects

    AEtuts posted Form An Attractive Energy Ball by Stefan Surmabojov. This tutorial creates an abstract energy ball using Trapcode Form and looks at layer maps, color correcting, and some workflow tips.

    Beyond this one, Andrew Kramer has several AE tutorials involving energy effects, for example a simpler energy ball (with just built-in effects) in 3D Light Casting, and fire effects might be repurposed for this effect in combination with other techniques. There must be another tutorial somewhere since this effect has been YouTube fodder for a while.


    Update: here's the YouTube one by Alex Damon that got 2.4 million hits since February 2007. A revision was promised in October.

    Archiving video can be cheap

    There were 2 good responses on a question on archiving digital video (mini DV) on the SF Cutters e-mail list today. Jim Feeley (editor at DV magazine in its heyday) suggested iDive, a simple semi-automatic cataloging program for Mac and CatDV (Mac/Win):

    "Feed the tapes into your VTR or camera, let iDive scan each tape and add sample images from each clip (or several images from longer clips) to its simple visual database. Oh, it also catalogs all the video, too. You don't need to sit down and hand log everything.
    ...
    I don't use iDive for stuff I've carefully shot. And there are more robust asset management apps (such as CatDV) that I use. But iDive is pretty nice and might really help you catalog, archive, and discover what's on those tapes without going crazy."

    Another option is Frameline 47 for Mac-- it's no longer in development but now available free with an NFR serial number. It EOLed in September 2010 so it may still work for many people.

    Another person on Cutter-Talk sugested looking at videos by Chris Fenwick (embedded below) based on presentations at recent SF Cutters meetings; see Saving data can be cheap Part 1 and Part 2. Chris says:

    "Remember, this is not the fastest method, this is not the most LONG LASTING system, and there are many people that will tell you I’m NUTS for storing data this way. However, I manage about 100TB of data this way and have used it for about 10 years. So, take that for what its worth. ...[Part 2 talks] about how to FIND everything you’ve stored."


    November 14, 2010

    Adobe After Effects CS5: Learn by Video

    Adobe After Effects CS5: Learn by Video by Angie Taylor and Todd Kopriva is shipping. It's 14+ hours of training on a DVD, plus a 120-page book from Video2brain. Here's what Todd, now in tech support, says about this package:

    "I made sure that every single question that we commonly get asked is covered... and hopefully prevented. That's the one way that I'm pretty sure that this series differs from all other resources for learning After Effects. As a separate project, I also recorded this very brief set of FAQ videos. These [free] videos are not on the DVD; longer and more detailed versions of some of the issues are, though.

    It's a foundation. This training series is designed to take someone from beginner level to intermediate level. The goal was to give an introduction that would give a person the fundamentals, concepts, and terminology with which to understand all of the other resources out there. We covered motion graphics and visual effects and compositing in roughly equal shares, with Angie doing more with motion graphics, and really showing the depth and fun of shapes, text, and 3D.

    Seriously, my focus was on making sure that someone watching these lessons would know all of the fundamental concepts, terms, and controls so that they could then go nuts watching tutorials, playing on their own, or learning however they wanted. I was going to make sure that their house was built on rock, not sand. Angie had a similar focus but, because we are such different people, she did more about actually creating and building. I think that this complementary set of lessons works very well together.
    [emphasis added + slight edits]"

    Update: BTW, Angie has another book out too, Design Essentials for the Motion Media Artist: A Practical Guide to Principles & Techniques, as well as an in-depth design reading list. I missed these using an old link!

    HDSLR Shopping? Check out Prolost + Philip Bloom

    Update: see more in Which Video DSLR?

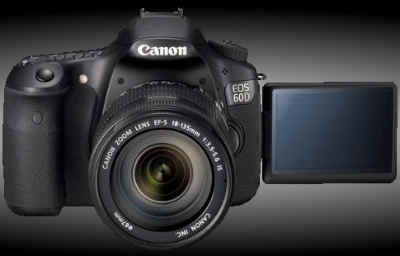
    Stu Maschwitz posted HDSLR Shopping? What You Want is a Canon 60D at Prolost. Stu compares DSLR cameras for HD video, and as always both the blog post and the comments are worth reading:


    "Using a DSLR for video a compromise. In addition to the technical limitations we’ve discussed here at length, the time-honored form factor of the SLR just wasn’t made for movies. The 60D takes a big step toward fixing this. To me, this matters a lot. The 5D Mark II shot you blew because you couldn’t see the LCD well enough to focus is worth nothing compared to the 60D shot you wrangled from an angle.

    If you’re already a Canon shooter, remember that while the 60D shares batteries with the 5D Mark II and the 7D, it uses SDHC cards instead of CF. I’ve put together a 60D Cine page on the ProLost store to help you get your kit going."

    Update: Different opinions in a Mograph thread, and Cinema 5D noted this video on Three Canon HDSLR’s Compared 550D, 60D and 7D,


    Grungy Sports Look tutorial

    Motionworks has a new After Effects tutorial video, Grungy Sports Look, at Digital Juice. You won't need their stock elements to these sorts of things, but they do provide 1280x720 elements for you.

    "In this tutorial learn how I recreated the look of the Kick Ass trailer graphics, with a sports theme, almost entirely from Digital Juice stock footage, photographs and music. As usual you’ll learn a bunch of After Effects workflow tips along the way."

    For many reels, example movies, and some news and commentary, check out the sports motion graphics specialty site Graphics Mafia.

    Behind the scenes of food TV

    There's undoubtedly more behind the scenes, but here's a few appetizers for the Julia Child black & white segment on editing (with kitchen utensils) & Dan Ackroyd's SNL homage (or Daily Motion or bad Youtube) below:


    The French Chef
    Uploaded by y10566. - Watch more comedy videos and sitcoms.

    The Dude ponders After Effects [spoiler]

    Not sure this should be said, but I finally empathized with The Dude and laughed as he pondered "after effects?" in The Big Lebowski.


    Mark Christiansen @ Apple Store: November 18

    @AdobeAE notes that Mark Christiansen will appear at the Apple Store in downtown San Francisco on Thursday November 18, 2010, 6:30-7:30 pm:

    "Join Mark Christiansen, author of Adobe After Effects CS5 Visual Effects and Compositing Studio Techniques, as he discusses how the world has been changed by advances in visual effects and compositing. Not sure what a compositor does? Mark will demystify effects compositing and demonstrate why it's such a valuable craft."

    It looks like Peachpit has a Book + eBook Bundle, which seems pretty handy.

    November 13, 2010

    Keyboard shortcuts you (maybe) don't use

    Laurence Grayson of Shortformvideo is back with another video tutorial (below), The best keyboard shortcuts you (probably) don't use, which is a bit like a primer for Chris Zwar on After Effects features that most people don’t seem to notice.

    Keyboard
    shortcuts were easier to learn in the past when Adobe had printed multi-fold shortcut guides. AE shortcuts (listed in Help and in the Adobe Shortcut App) can be edited in preferences, but it's much easier with Jeff Almasol's script UI "KeyEd Up." The old Use After Effects' Shortcuts with non-English Keyboards by Jonas Hummelstrand seems like it's still useful, as does the Adobe After Effects CS4 Keyboard Shortcuts Cheatsheet (printable PDF) by Denis Klepcha on Aetuts.

    'Movie Magic' template tutorial

    Aharon Rabinowitz posted a Movie Magic Template Tutorial that breaks down his free Red Giant People template "Movie Magic" so you can alter the template for your own projects.

    Movie Magic Template Tutorial from Aharon Rabinowitz on Vimeo.

    November 12, 2010

    Repoussé in After Effects CS5

    Chris Meyer has intro videos on the Repousse 3D feature from Photoshop CS5 Extended. He covers this relatively immature feature in both Photoshop and After Effects in his video tutorial series New Creative Techniques at Lynda.com (shown below). Chris also provides a few comments on lights & shadows, nVidia acceleration, and so forth at Todd Kopriva's blog and in Creating Motion Graphics.

    Update: see a Shortformvideo tutorial on how to get Fringe-style floating 3D text using Repousse in with AE and PFHoe.


    Burning Edges transition in After Effects

    Umask.TV, a "design resource for art in motion," posted a Burning Edges in AE Tutorial (via Lester Banks on the Vimeo beat):

    November 11, 2010

    Tutorials for After Effects in Arabic

    Kevin Monahan noted that Qtab.net has tutorials for After Effects in Arabic, a language not included in the usual documentation (see After Effects in English & other languages).

    For tutorials and scripts on using Arabic in AE, see AEP posts ArabicText: script for Arabic text flow in AE and “Right To Left” languages in After Effects.

    How to Optimize Projects in After Effects CS5

    Peachpit posted a chapter from Mark Christiansen's Adobe After Effects CS5 Visual Effects and Compositing Studio Techniques, How to Optimize Projects in Adobe After Effects CS5. Here's the intro:

    Sometimes you take the attitude of a master chef—you know what can be prepped and considered "done" before the guests are in the restaurant and it's time to assemble the pièce de résistance. At other times, you're more like a programmer, isolating and debugging elements of a project, even creating controlled tests to figure out how things are working. This chapter helps you both artistically and technically (as if it's possible to separate the two). Once you
    • understand how to use multiple compositions
    • know when to precomp (and when it's safe to avoid it)
    • know how to optimize rendering time
    you may find the After Effects experience closer to what you might consider "real time." This type of efficient rendering depends not only on optimized software and a speedy workstation, but on well-organized compositions and the ability to plan for bottlenecks and other complications.

    Note: for performance-related info, see Todd Kopriva
    post, FAQ: What are the optimum memory settings for best performance in After Effects CS4 and CS5? (and the video version), which links to various help resources. Fav quote, "Because compositions and computer systems vary greatly, there is no one right answer to this question."